Monday, December 30, 2013

Macro

f36 1/60 ISO 100


f 36 1/60 ISO 100


f22 5s ISO 100


f22 3s ISO 100


f36 1/160s ISO 250


f22 1/125s ISO 1,600


f36 1/160s ISO 250


f22 1/60s ISO 100

Sunday, December 29, 2013

Night

18mm f22 25s ISO 100


18mm f22 15s ISO 100


19mm f18 15s ISO 100 
19mm f18 6s ISO 100


20mm f18 8s ISO 100


18mm f10 105.3s ISO 200


22mm f16 4s ISO 100


18mm f14 30s ISO 1000

Friday, December 27, 2013

Abstract

All these abstract images of toothpicks taped to a glass bowl were taken with the D7000 with the 50mm f1.4 lens on a set of extension tubes using natural light, an SB-600, and an SB-800.

ISO 100 f/11 1/160

ISO 100 f/1.4 1/250 

ISO 100 f/2 1/250 

ISO 100 f/11 1/160 

ISO 100 f/2 1/250

Sunday, December 22, 2013

Perception Of Scale In Macro Photography; Why You Should Take Macro Pictures Of Large Things

f22 1/60s ISO 100, with SB-800 directly above and SB-600 to the left
Macro photography can have a massive visual impact by granting access to an alien world where things are perceived very differently than our natural vision.

f36 1/160 ISO 100 SB-800 flash
As things get smaller, problems like depth of field and diffraction get bigger, decreasing the image quality (all else held equal). However, if you can take a picture of an object that is larger than average, you can often increase the impact of the image because the viewpoint is very different from the viewer's normal experience. Likewise, taking a picture of a smaller than assumed object can reduce the impact of the image, because it looks closer to what the viewer perceives as normal.

When looking at photos, viewers subconsciously make assumptions about the scale of the subject. At normal magnification, the viewer's assumptions are usually quite accurate, but at high magnification people have less reference and tend to assume that the object they're looking at is the size they're used to. For example, the image on the right gives away very little information about the size of the whole leaf, so while a very knowledgable viewer might be able to guess the species and therefore guess the size, most viewers will naturally assume it is an average size leaf.

Example

To illustrate just how much the size of the subject compared to the perceived size of the subject matters, I photographed text on a page—something everyone is familiar with and has a sense of what's "normal" size—at different font sizes. All the images in this series are RAW images from the D7000 that have simply been cropped slightly, all taken through the same lens at the same focal distance under the same light.

f8 1/60s ISO 100 SB-800 and SB-600 flashes
First I'll start with an example of what not to do. I accidentally printed a huge map onto a small piece of paper a while ago while planning a camping trip, and kept it because it looks interesting even though it's illegible. However, even though this map looks interesting on an 8.5" by 11" sheet of paper, it makes a really low-impact macro image because no viewer will expect that the map was tiny, they will assume it was badly printed and this photo isn't very close to the paper at all.


f8 1/60s ISO 100 SB-800 and SB-600 flashes
Then, this is an example of a macro image of something "normal" sized, Didot font at 12 pt. Because the subject of this image is the size the viewer expects, it looks like something you could see through a magnifying glass, not something unusual and special.

The 12pt font looks far more interesting than the map, but still lacks any impact, it looks more like bad printing on rough paper than a high magnification photo.


f8 1/60s ISO 100 SB-800 and SB-600 flashes
At 24pt we begin to feel like we're zooming in and the photo gets a little more interesting, but still looks easy to take and lacks the ability to capture and hold a viewer's eye.


f8 1/60s ISO 100 SB-800 and SB-600 flashes
Stepping up to 48pt allows a single character to fill the entire frame. This gives the viewer the sense that they are looking at a good print on nice paper that would look smooth and perfect to the naked eye, but at such a high level of magnification that they can see otherwise invisible imperfections. Remember that there's no zooming in these photos, all four were taken with the same fixed focal length lens the exact same distance from the camera.


Application

In the real world, where people use cameras to capture pictures instead of pretending they're scanners, this technique still applies. Macro photos of oranges will seem more magnified than macro photos of clementines, pictures of large leaves with complex vein structures will look more interesting than smaller leaves that reveal less detail, and so on. Obviously there are many factors that effect the viewer's perception of scale, but it is possible to skew that size assumption in your favor so you can create sharper, deeper images of smaller looking things.

Saturday, December 21, 2013

Sharpness: Aperture and Diffraction

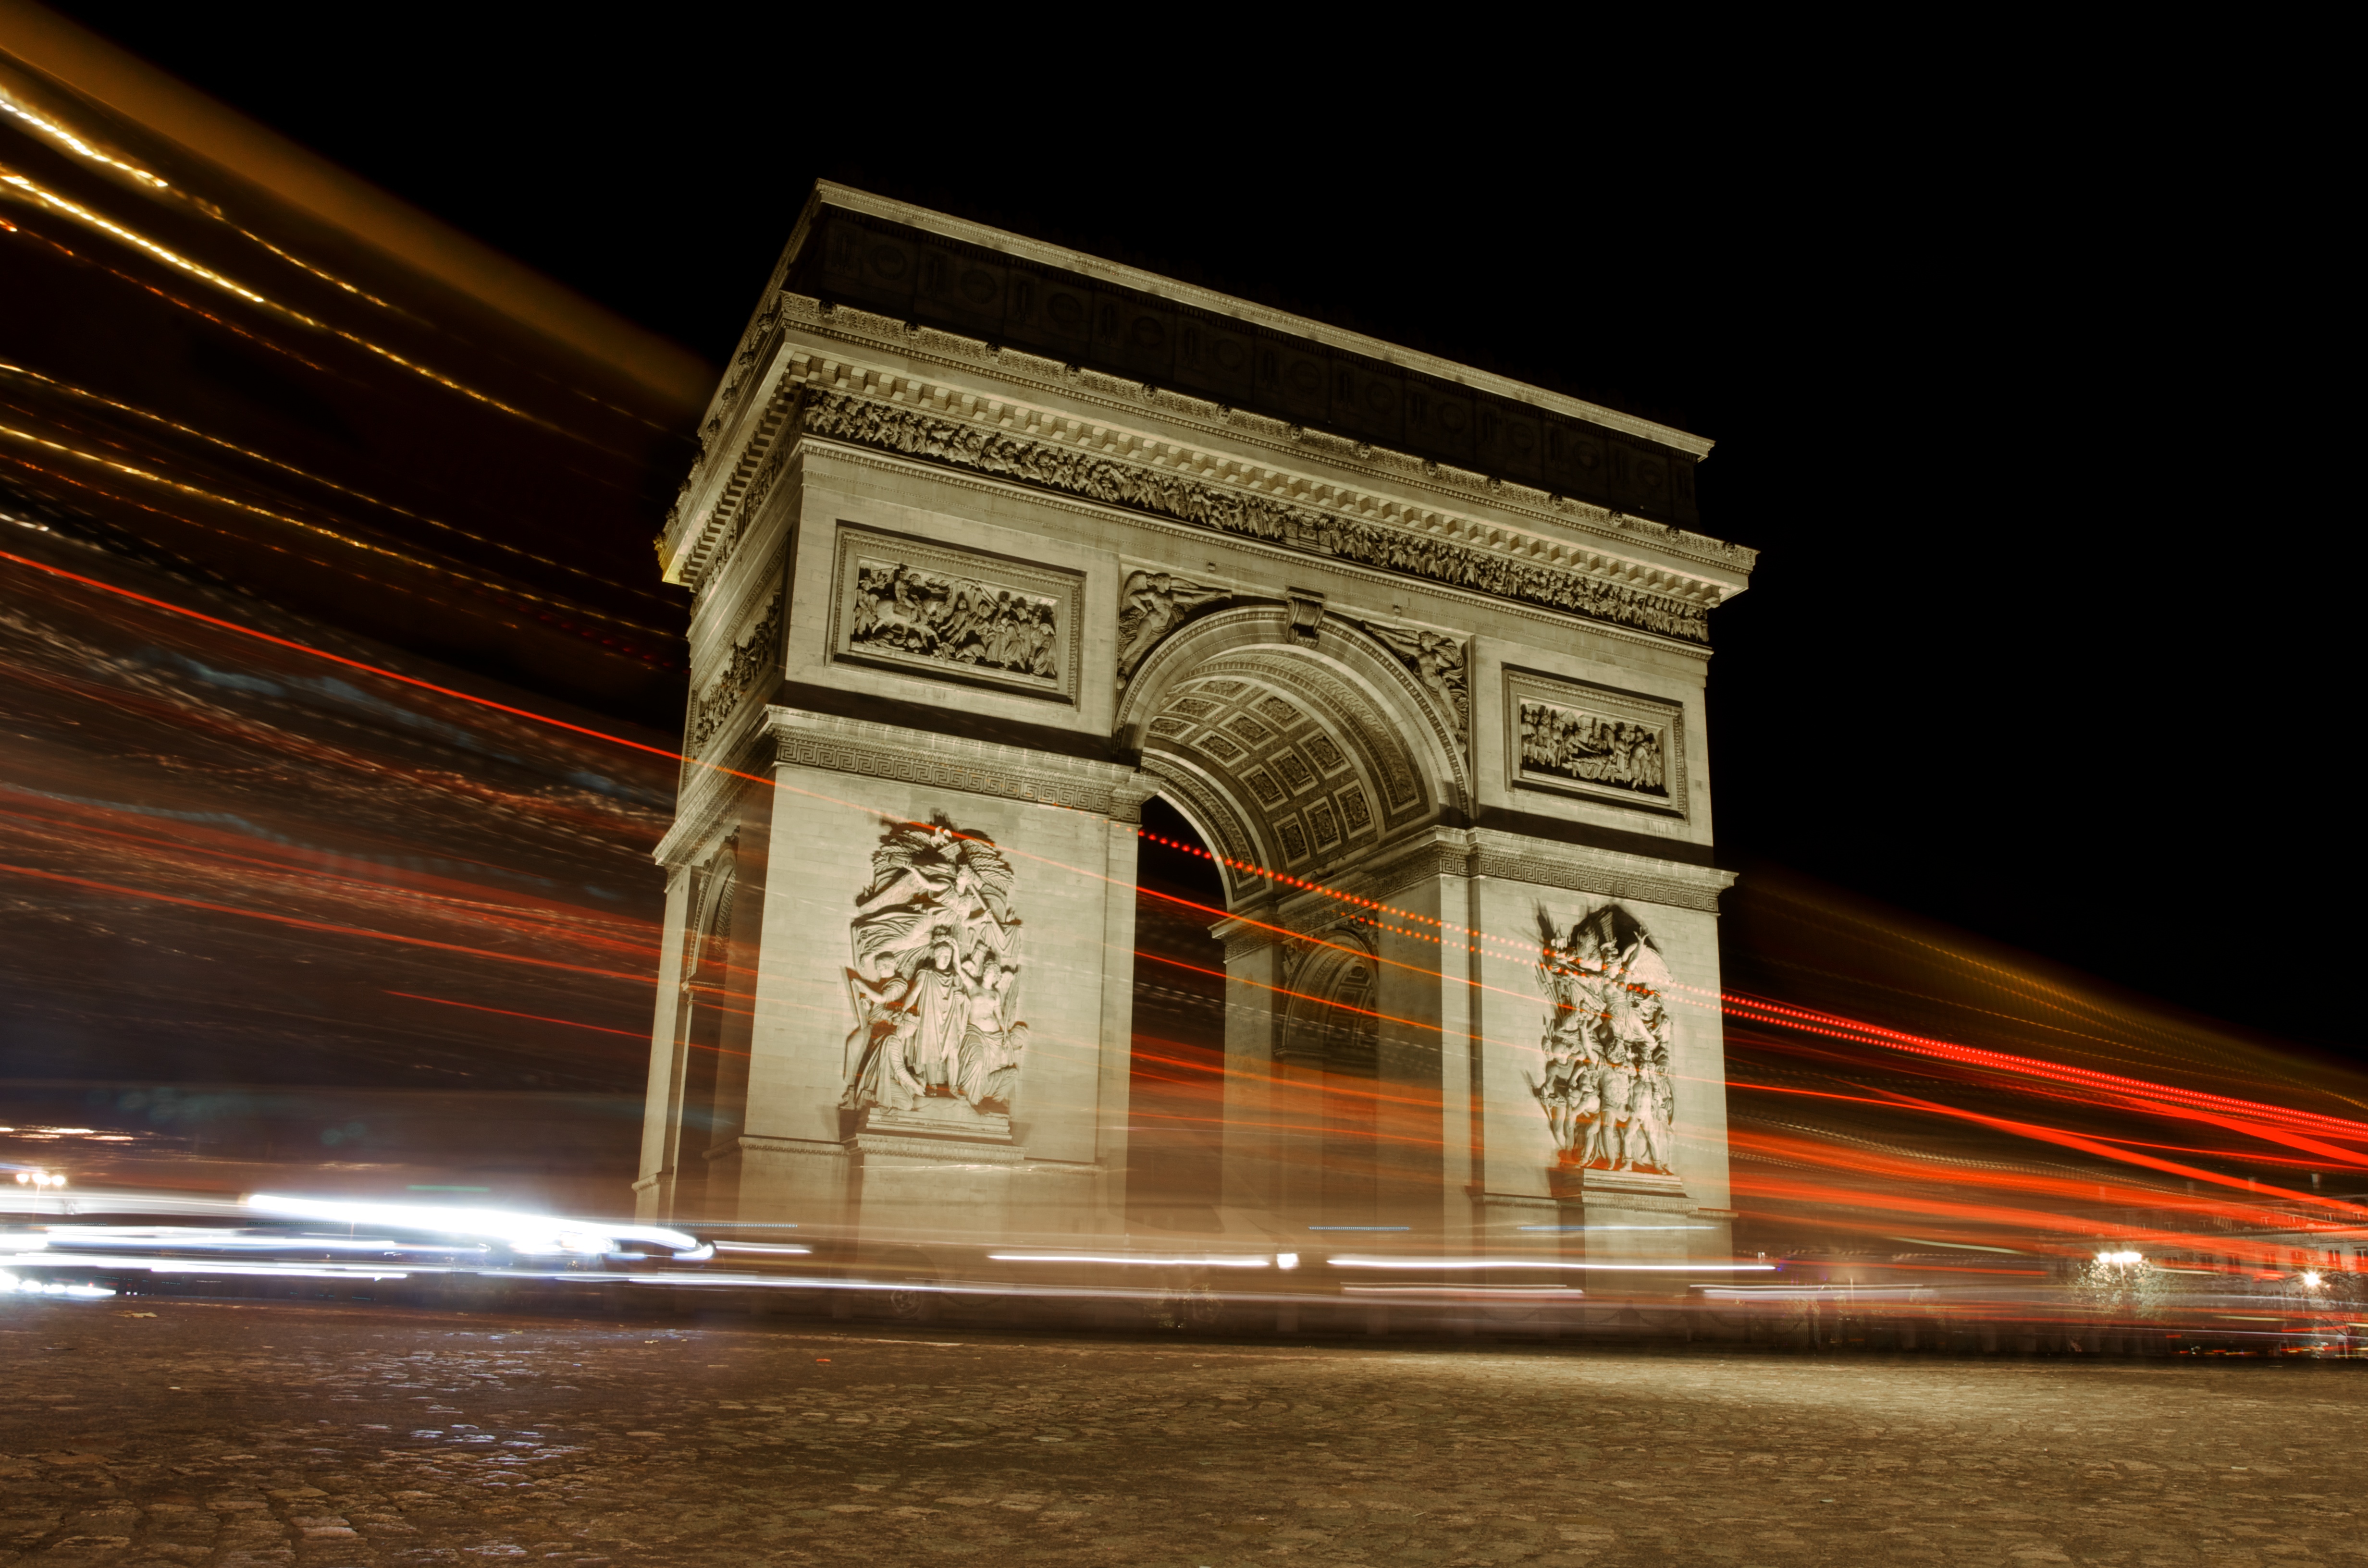
18-55mm @ 18mm f22 15s ISO 100

This is the article I wish I'd read before traveling to France and taking pictures like the one on the right. In the full resolution image here, fuzziness caused by diffraction is clearly noticeable.

Depth of field and Diffraction

Changing the aperture of a camera is the best way to change the depth of field. Larger apertures produce images with smooth, dreamy qualities that have a very depth of field, while smaller apertures produce images with a much larger depth of field. This may lead some photographers to think that the smaller the aperture is, the sharper the image will be, but that is not true.

When light rays travel through a small hole they bend and interfere with each other, an effect known as diffraction. Unfortunately, this creates a difficult tradeoff for photographers, because stopping down the lens to increase depth of field also increases diffraction. The result is a photo that has a large depth of field but is quite fuzzy.

This issue gets bigger at larger formats, because increasing the size of the sensor (or film) decreases the depth of field. This is why medium format cameras have aperture settings far smaller then f22 (the most common minimum aperture on modern lenses built for digital APS-C and FX sensors). lenses for medium format often have minimum apertures of f45.

The Practical Test

I set up a still life and shot it with three different cameras to demonstrate the effects of diffraction and pixel size. The D50 has 6.1 MP sensor, the D7000 has a 16.2 MP sensor, and the D7100 has a 24.1 MP sensor. The reason I chose to demonstrate with three cameras at three different resolutions but the same sensor size (Nikon DX, also known as APS-C), is because the pixel size on the sensor matters. A camera with larger physical pixels is less effected by diffraction than a camera with smaller pixels packed more tightly together because the ratio between the pixel size and the diffraction pattern (called an airy disk) size is smaller. This Cambridge in Color page goes into more detail. The best way to demonstrate this would be by comparing two cameras with different sensor sizes but the same resolution, like the Nikon D7100 and Nikon D600, but I don't have a D600 available.

Cameras:

50mm f1.4 @ f8 1/60 ISO 100
I didn't end up posting the D7000 images on this page, but I'll link to the full images at the end.

Test shot:

I set up this still life with an old book because it has a very high level of detail—the D7000 at f8 can see individual printing dots—and can be parallel to the focal plane to try and remove some of the effects of the depth of field changes. All test shots were shot on a tripod with a tether or remote shutter and are unprocessed raw images straight from the camera that have been aligned and white balanced. All test images were shot through the same 50mm f1.8 lens at ISO 100, except for the D50 which only goes down to ISO 200.

D7100 50mm f1.8 @ f8 2.5s ISO 100


Starting with the D7100, here are 100% crops 

D7100 f4 0.6s ISO 100
Between f4 and f8 diffraction is not a significant factor at all, so aperture size makes very little difference in sharpness.

D7100 f8 2.5s ISO 100
However, by f22 the width of the airy disk begins to overlap multiple pixels and multiply airy disks begin to interfere, severely limiting the resolution of the camera.

D7100 f22 20s ISO 100

The Nikon D50 is a much older, lower resolution camera, but as a result it has larger individual pixels spread out over the same sensor size. The result is that the camera has lower resolution at all apertures but loses less of that resolution to diffraction.

D50 f4 0.6s ISO 200


As with the D7000, there is little to no visible difference between f4 and f8 in the D50.

D50 f8 2.5s ISO 200


By f22 the 'fuzz' is quite obvious but the difference between f8 and f22 is much smaller than on the D7100 because the D50 has fewer, larger pixels.

D50 f22 20s ISO 200


Real world implications

Diffraction in APS-C and FX cameras is not as much of a restraint as it is in larger format cameras, but not understanding the concept will severely limit modern DSLRs that have very small pixels. You have to understand all the details or you won't get the most out of your camera.

Here's a stark example of that: Two images, taken with two different cameras through the same lens with the same settings on everything but aperture. The D50 is worth about $150, and the D7100 is worth about $1,100, but the D50 is set at f8 and the D7100 is set at f22. These images are raw from the camera, then I corrected the alignment, exposure (a tiny bit, they were pretty accurate already), and white balance. 


The camera on the left is the Nikon D50, the camera at the right is the D7100. This is a visual example of what many of the best photographers often repeat: the photographer matters more than the camera. If both were shot perfectly, the D7100 would win hands down, but if you don't understand the subtleties of photography you'll never improve just by buying new equipment.


Full resolution test photos 

Nikon D7100 f4
Nikon D7100 f8
Nikon D7100 f22

Nikon D7000 f4
Nikon D7000 f8
Nikon D7000 f22

Nikon D50 f4
Nikon D50 f8
Nikon D50 f22


DIY Macro: Reverse Lens Technique

Metadata: 18-55mm with reversed 55mm @ 55mm f36 1/60s ISO 250

High quality lenses with a 1:1 reproduction ratio suitable for true macro photography are extremely expensive. One of the best, the Nikon AF Micro-Nikkor 200mm f/4D IF-ED, costs about $1,794.95, so it's no surprise that the internet abounds with ways ways to cheaply modify lenses to increase the reproduction ratio. This page will show how to reverse and combine lenses to get really high reproduction ratios.

50mm f1.8, @ f8 1/250s ISO 100 with SB-800
First, however, I should mention that there are other, easier ways of focusing closer to your subject, such as these macro lens attachments.

This is the simplest way to increase your reproduction ratio. These lenses are usually very inexpensive and usually come in sets labeled +1, +2, and +3, like mine on the right. they simply screw onto the end of an existing
lens (I put them on my 50mm f1.8 prime) and reduce the focusing distance a bit.


D7100 50mm f1.4 @ f10 1/60s ISO 100 with three flashes
A way to get even closer, however, is to attach the lens backwards, either with a reversing ring (also known as a macro mount) or with electrical tape like here (though I was only shooting indoors with this). This lens arrangement allows you to focus much closer than with a set of macro lens attachments, but you lose the ability to use any lens automation—no camera controlled aperture, no autofocus, no distance metering (which only applies to D lenses)—so all that has to be set manually. As a result, this technique works best with lenses that have an aperture ring. Gelded lenses lack the aperture ring, so if they are detached from the camera they will only shoot at their minimum aperture, which makes focusing and framing difficult because the vewfinder is very dark. The reversed lens should always be focused to infinity, I found it helpful to tape the focus so it couldn't drift (unnecessary on lenses with internal focus motors as the internal motor should hold it in place)

Here's an example with a clementine (not a full sized orange): 

50mm f1.8 reversed @ f22 2s ISO 100


If this isn't close enough for you (and it wasn't close enough for me), you can actually combine multiple lenses. I attached my 18-55mm G lens to the end of my 50mm prime with a piece of electrical tape, making a lens that focused far closer to the subject and was actually durable enough to use without any worry of getting dust into the camera or having the lens fall off. 

D7000 50mm f1.4 @ f10 1/60s ISO 125
  This lens combination works really well for surprisingly sharp and close macros. The G lens is connected to the camera body like normal, so aperture control is retained. The inside lens should be zoomed to the furthest telephoto setting to reduce vignetting (and any filters attached to the lenses will increase vignetting) and focused to its closest focus point. The outer lens has to be a non-G stopped wide open (faster lenses like this f1.8 do best here) and focused to infinity. 

The biggest problem I had with this setup was the way that the lens can move in three different ways, outer focus, inner focus, and zoom, making focusing difficult. This problem was easily solved by simply taping across all three joints in the lenses so that it was always set to the closest focus distance. I focused by moving the camera and subject.

Here's a few examples!
18-55mm lens with 50mm f1.8 reversed @ f32 1/60s ISO 100 with SB-800

18-55mm lens with 50mm f1.8 reversed @ f22 3s ISO 100


18-55mm lens with 50mm f1.8 reversed @ f22 1/125s ISO 1600 with SB-800